The shuttle and roller have now been moved out of the way by the threading action so it's time to examine the ACE assembly and to clean it once again. The ACE is important for the proper playback of your Beta tapes, so this extra attention is time well spent. Use the picture below to once again identify and locate the ACE (Audio, Control and Erase) assembly. Even though it may look clean, it is easy to overlook stubborn oxide deposits that are black and can blend in with the composite material that makes up the assembly. 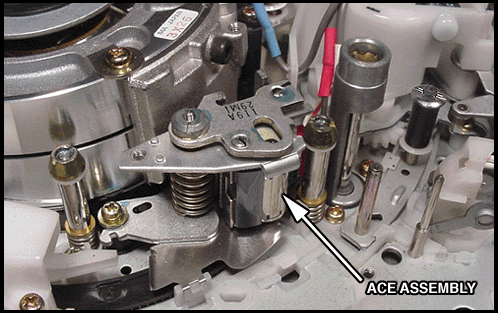 Continue scrolling down. 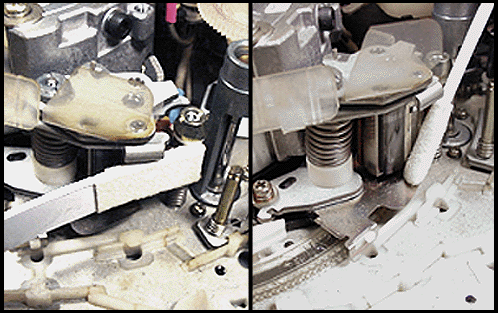 The above photo shows cleaning using a two types of swabs. On the left is the chamois tipped plastic plank and on the right is the cotton tipped wooden rod. Use both with a "wet in solvent then rub" operation to dissolve and remove stubborn deposits. The dental mirror and/or a magnifying glass may help in this procedure. It is imperative that the ACE be completely clean for proper tape contact. Once it is free of all build up scroll down to see the next photo. 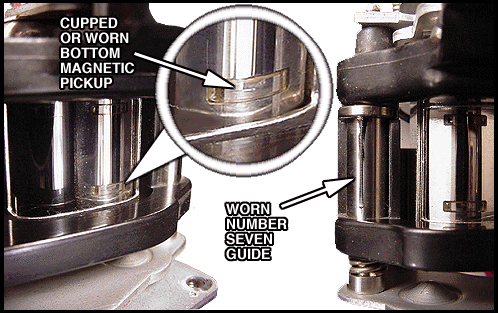 This photo shows an ACE assembly (at left and center) that most likely will not operate properly. The bottom magnetic pickup (the control track) has been worn away to the point that the tape will have trouble coming in proper contact with it. If there is no contact there is no pulse signal available for the machine to use to produce a playback picture. An ACE in this condition must be reconditioned or replaced, cleaning or adjusting would probably not help restore video operation. The some of the guide wear illustrated above can be tolerated provided it doesn't produce too much drag on the tape or cause it to wander. A worn ACE and too much drag from guide wear are areas that will require professional repair. Scroll to the next photo. 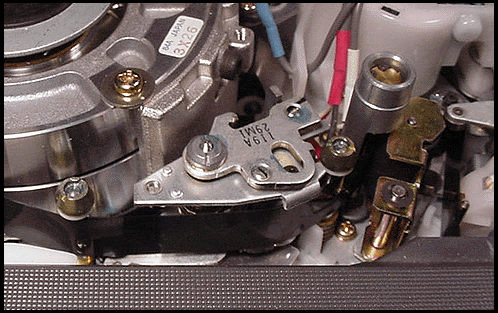 I included this photo to show how the tape travels over the ACE during recording and playback. It must slide over the surface of the ACE completely flat to be reliable. |